Daily Schedule
Navigating the Schedule
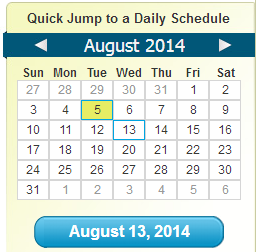
You can access your Daily Schedule from the Schedule tab at the top of each page of your Member Dashboard, the Quick Jump calendar in the left panel, or from the Today's Schedule link located within Quick Links at the bottom of each page in the Dashboard.


The blue buttons to either side of the day’s date will allow you to navigate forward and backward by one date. To pick a specific date, use the Quick Jump calendar located on the left panel of your Member Dashboard.
If your office has multiple locations, we will default to the first location alphabetically. To switch between locations, just use the location drop-down menu located in the upper right corner of your screen. You can adjust the display name for your locations in this menu and your reminders through the General Settings tab.

A printable PDF version of your Daily Schedule displaying all information is also available at the Printable version link at the top right corner of the schedule.
Patient Information
Your daily schedule will display a list of patients and appointment times that we’ve populated from your practice management system. This list can be sorted by patient name or by time by clicking on “Patient” or “Time” on the top bar.

Appointments associated with disabled procedure codes will not display on your Daily Schedule. Please see our Procedure Codes page for more information on how to manage these codes.
Confirmed
The confirmed column indicates whether or not a patient has confirmed his or her appointment. There are five possible confirmation statuses.
| Patient has confirmed via email reminder | |
| Patient has confirmed via voice reminder | |
| Patient has confirmed via text reminder | |
| Patient has confirmed via his or her Patient Pages | |
| Office has confirmed the patient using the Daily Schedule |
You can confirm a patient’s appointment by clicking the Confirm button in the far right column. Please note that there is no way to remove a confirmation from an appointment.
This column will display whether patients have an email address registered for reminders, either on their own account or on an unblocked Responsible Party account.
| Indicates the patient has an email address registered | |
| |
Indicates that a patient does not have an email address registered |
Your office can use the Set Date button to track when you have requested an e-mail address from unregistered patients. If the patient indicates that they don't want to provide you with an e-mail address, just click the button and it will change to display the current date, and you will know when you've last asked them for this information.
Profile
The Profile bar indicates the “completeness” of a patient’s contact information. This bar is filled according to the following criteria.
If your office uses Voice reminders
- Patient has a physical address
- Patient has an email address
- Patient has a phone number registered for Voice calls
- Patient has a phone number registered for text reminders
If your office does not use Voice reminders
- Patient has a physical address
- Patient has an email address
- Patient has a phone number
- Patient has a phone number registered for text reminders
Members of our support team are available Monday through Friday, from 6:00 AM until 5:00 PM Pacific. You can reach us Toll Free at 888-416-8431.


